AI tools can answer general questions, but what they can't do on their own is understand your business data, your schema, or your performance history.
If you want meaningful analysis, you need structure behind the scenes. That means clean data pipelines, reliable data transfers, and a way to push curated datasets into an AI environment.
This guide walks through how to automate data analysis using ChatGPT vector stores and Calibrate's Launchpad platform. The result is a repeatable workflow that connects your data warehouse, APIs, or analytics platforms directly to an AI assistant trained on your actual business data.
Why Automate Data Analysis With ChatGPT?
Most teams experiment with AI by pasting exports into a chat window. It works for one-off questions, but it doesnt scale.
To operationalize AI in analytics, you need:
- Automated data ingestion from APIs, warehouses, or CSV files
- Scheduled jobs that keep data current
- Structured schemas that control what the AI sees
- A searchable vector store that enables semantic retrieval
This setup transforms ChatGPT from a generic chatbot into a business intelligence assistant that understands your metrics, dimensions, and historical performance.
Step 1: Configure Your ChatGPT Vector Store and Create an Assistant
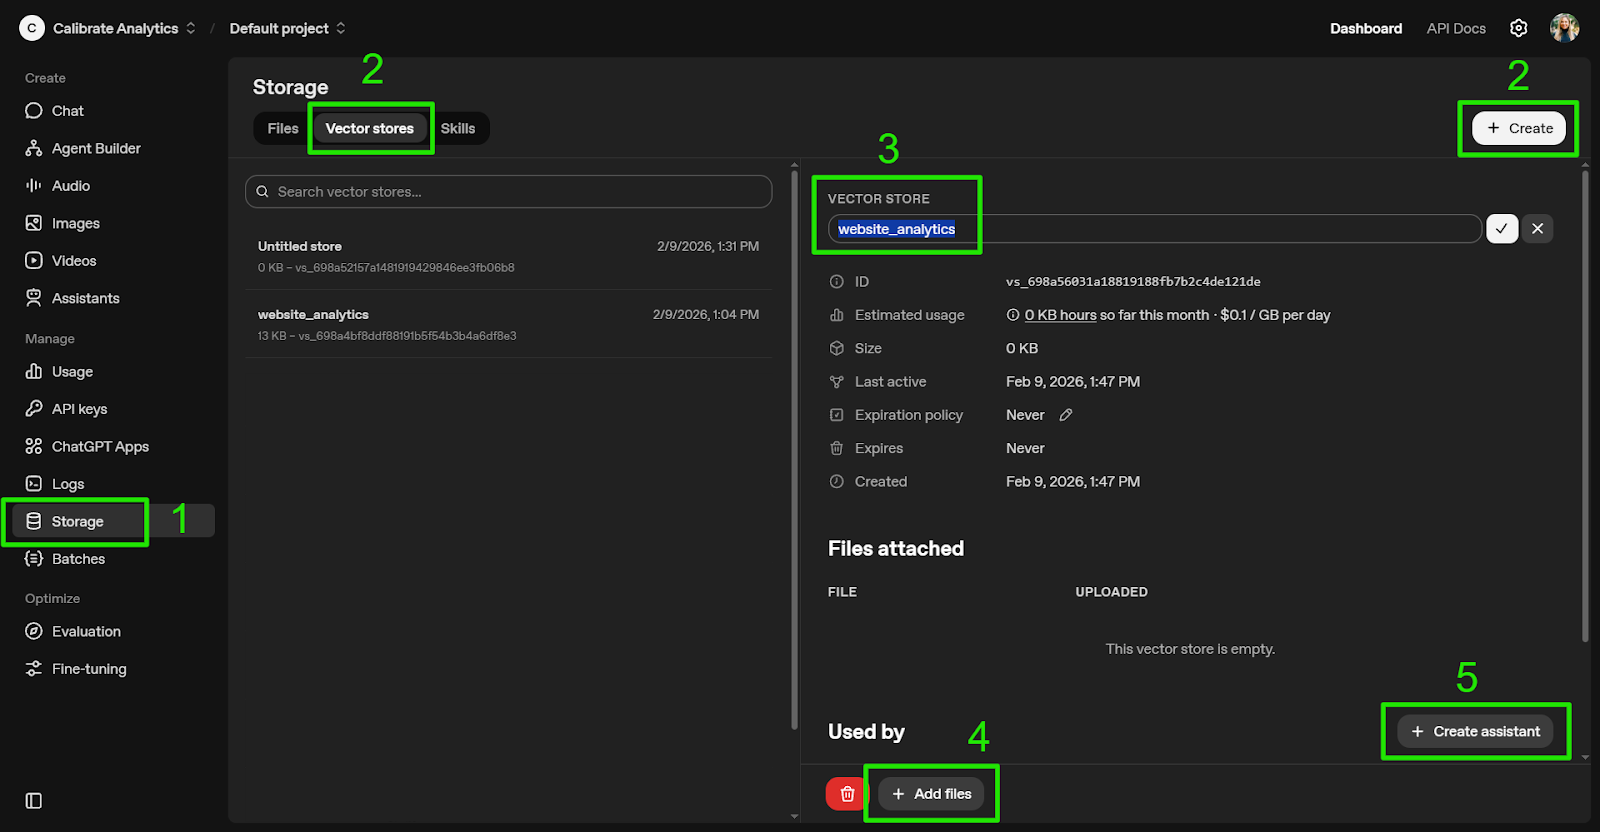
After you log into the OpenAI Platform:
- Navigate to "Storage" in the sidebar
- Click "Vector stores" then "Create"
- Name your Vector store
- Click "Add files" and select the document sources you will use (PDFs, CSVs, JSON, etc.)
- Index your data so it's searchable via semantic similarity
- Click "Create assistant," which will generate an untitled assistant already linked to the Vector store
Vector stores can exist independently and be attached to multiple assistants. You can also create the assistant first and connect the vector store later.
This flexibility allows you to segment data by department, region, or business function.
Step 2: Configure Your ChatGPT Assistant
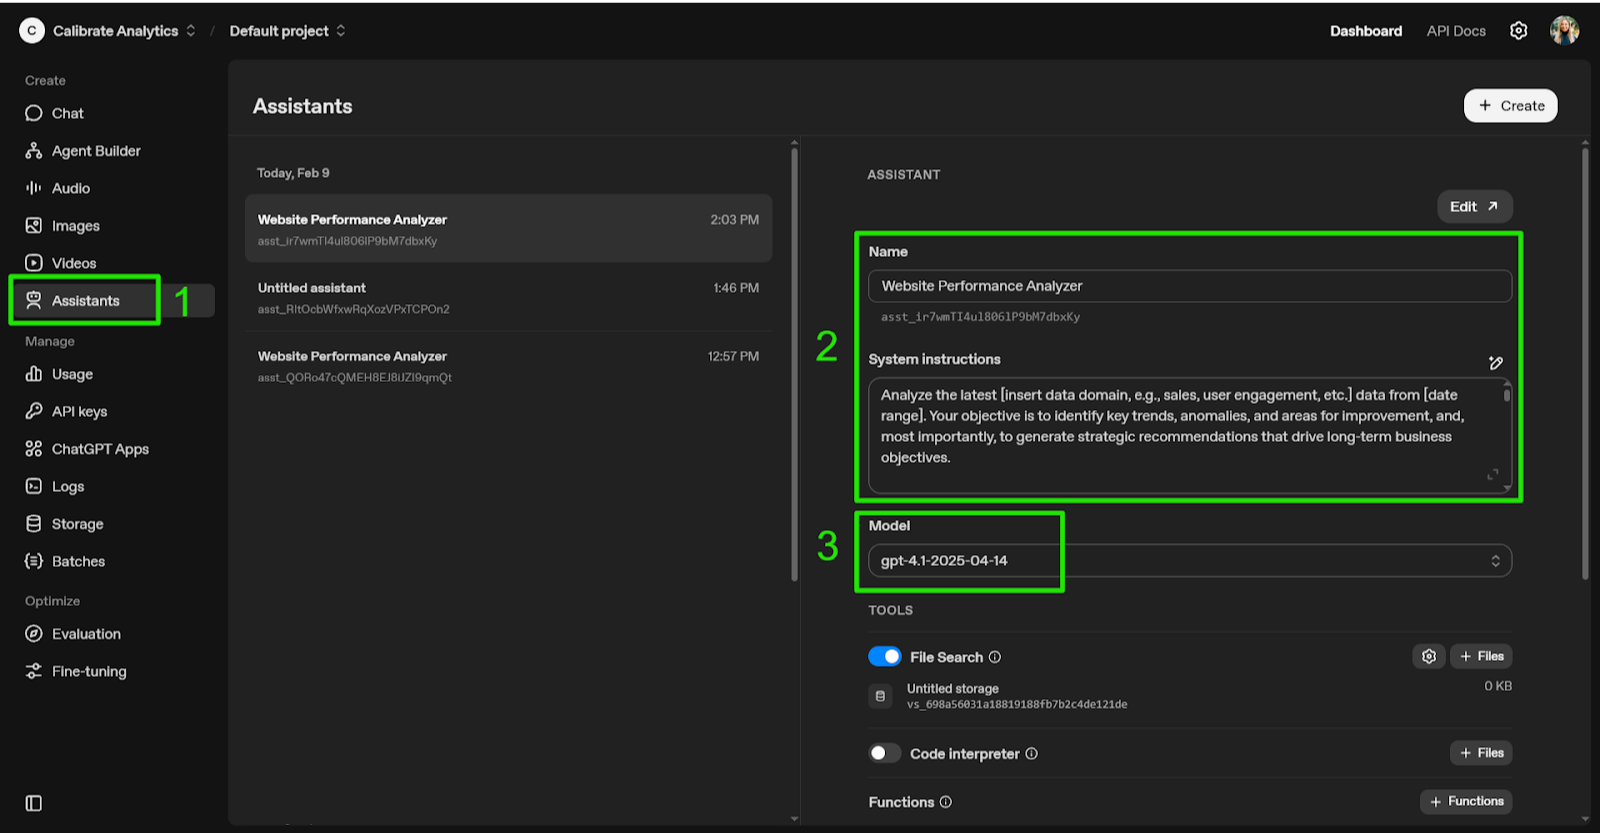
Navigate to Assistants and select the newly created assistant.
- Name your assistant
- Add system Instructions to define tone, expertise, and analytical expectations
- Select the appropriate model based on accuracy needs, context window, and budget
Clear system instructions matter. This is where you define how the assistant should interpret trends, flag anomalies, and generate strategic recommendations.
Step 3: Configure a ChatGPT Vector Store Destination
After logging into Launchpad:
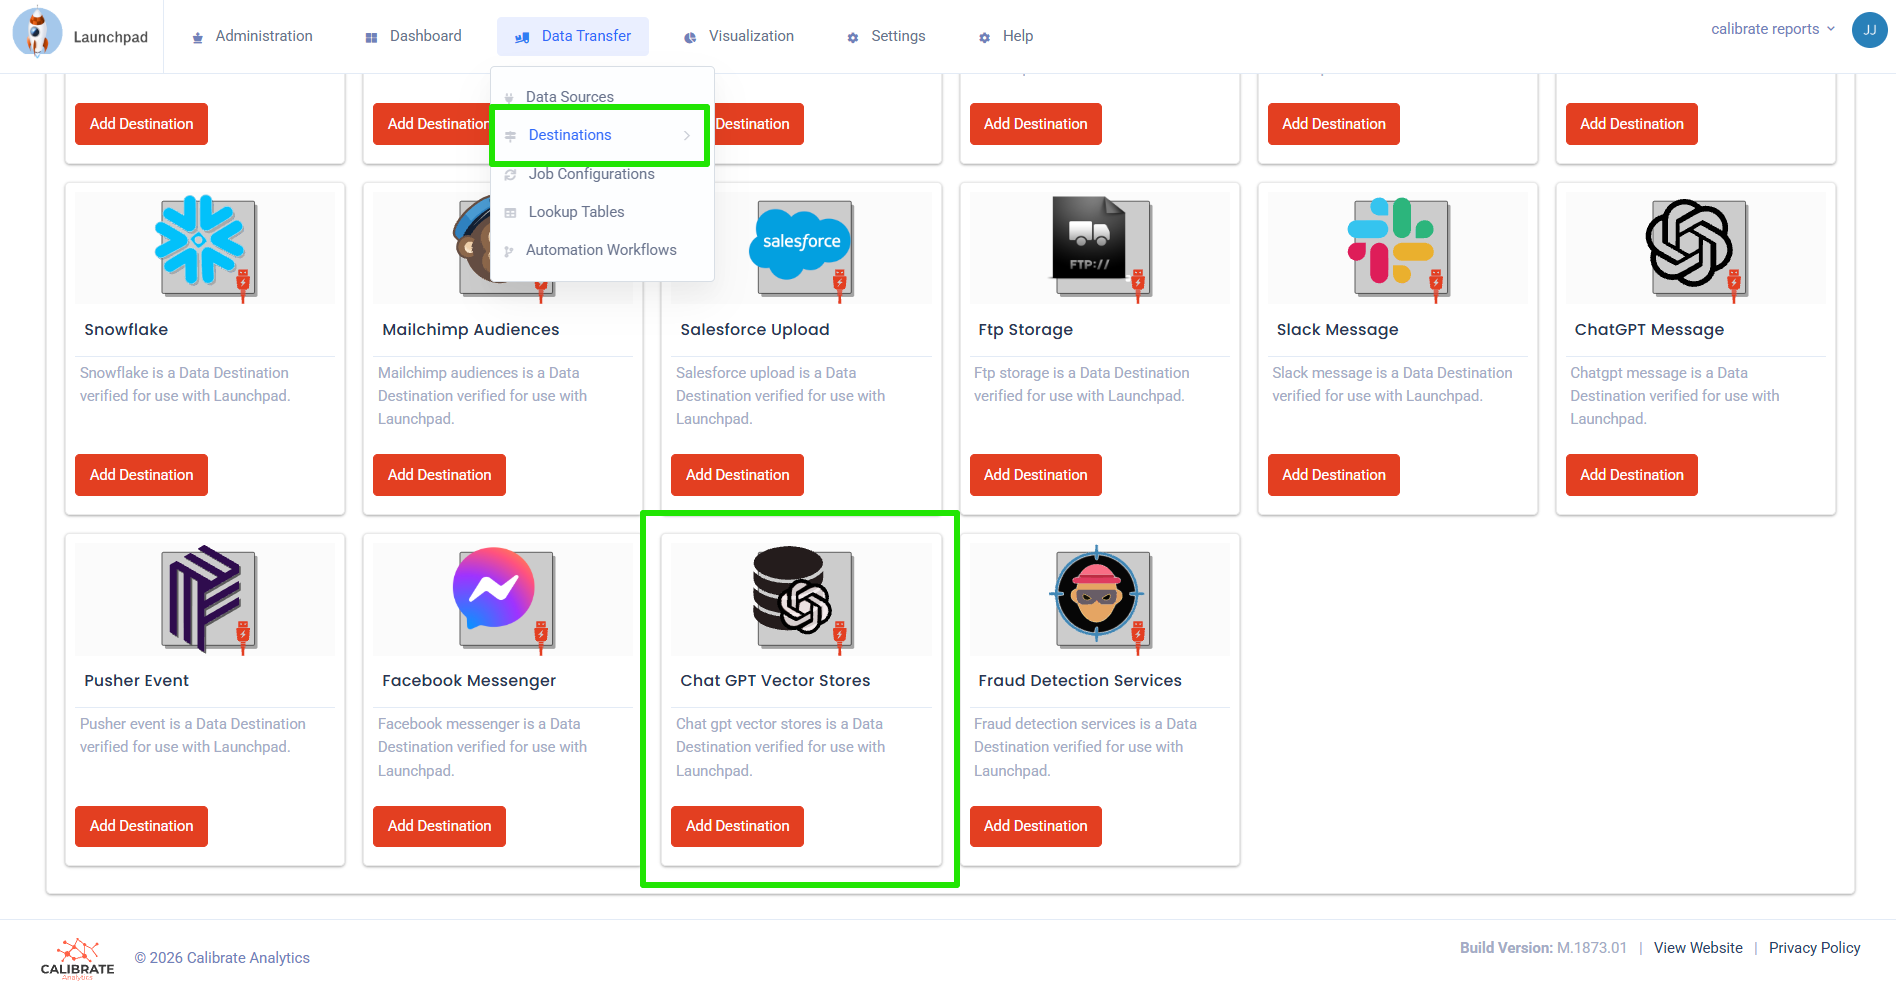
- Navigate to Data Transfer → Destinations
- Select "Add Destination" and choose "ChatGPT Vector Stores"
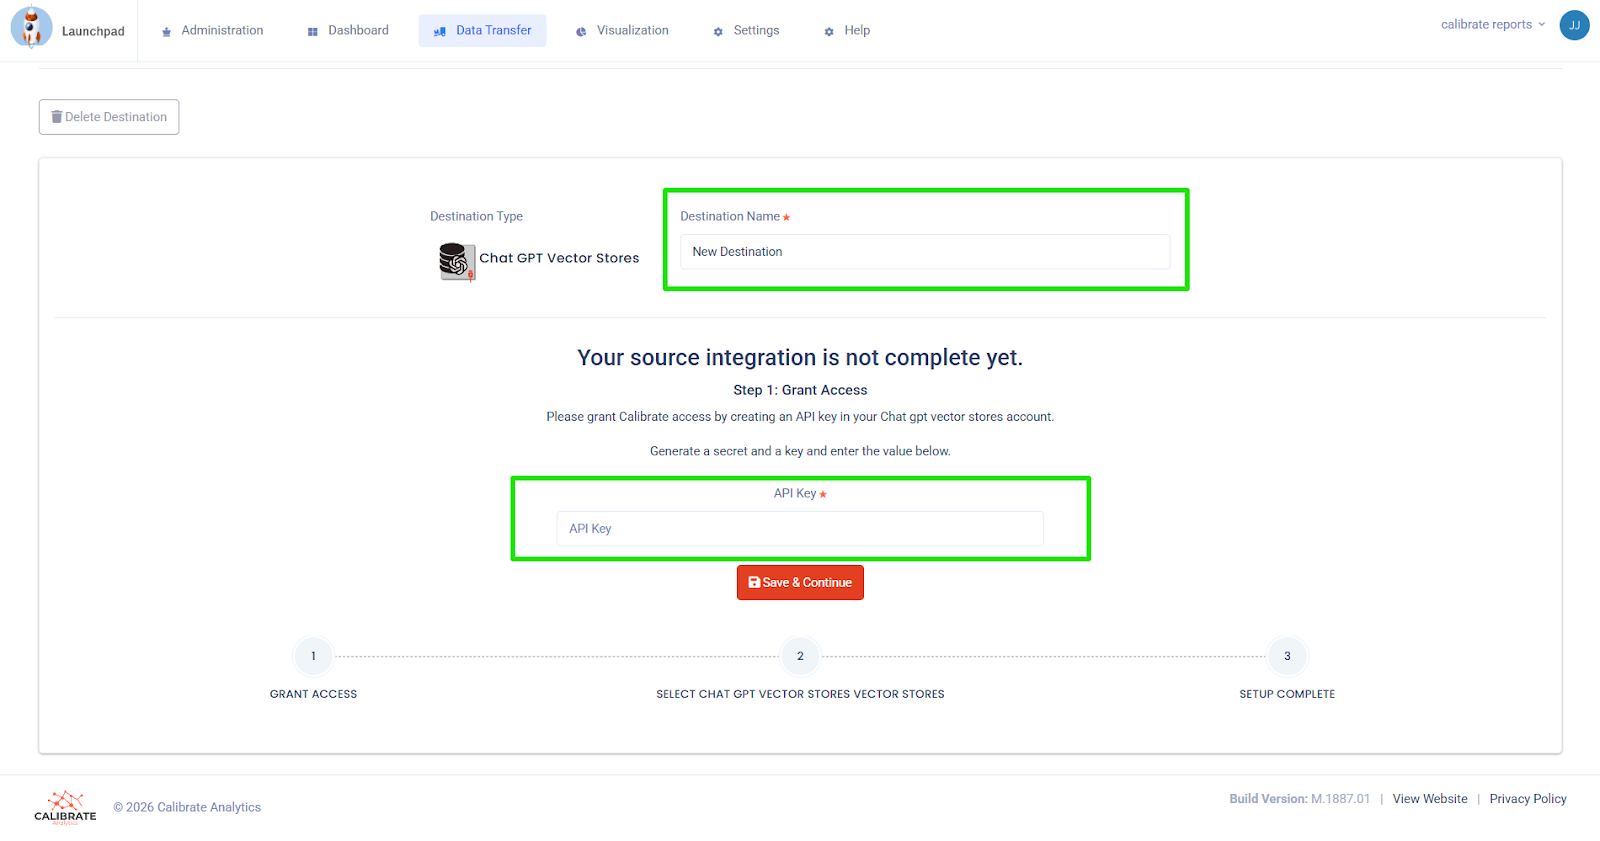
- Enter your API Key, then click save and continue
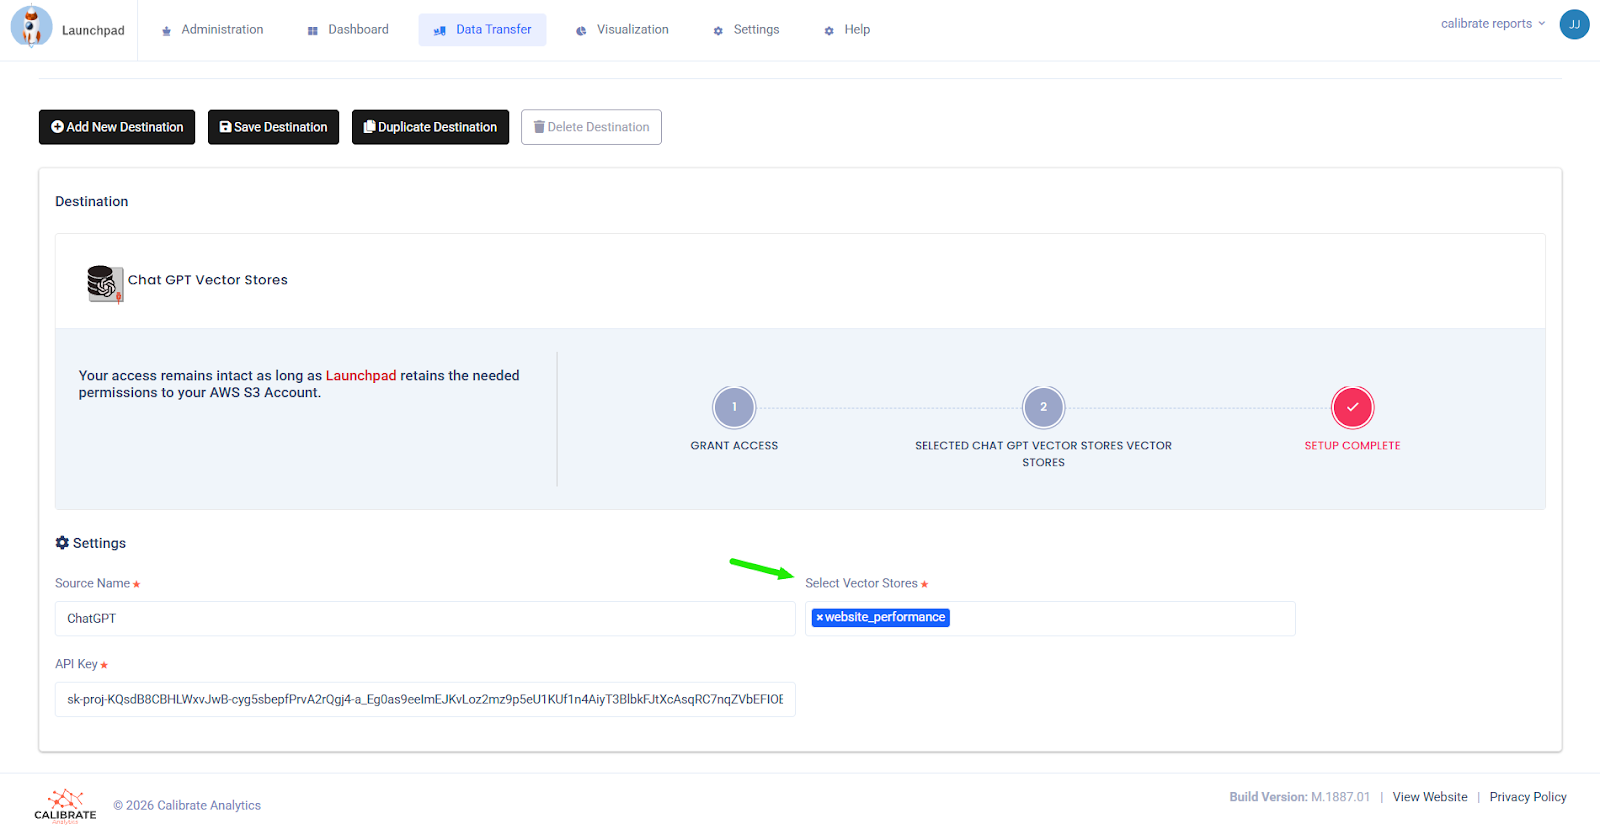
- Select the vector store name(s) you will use, then click save
- Confirm the connection to ensure Launchpad can send processed data to the Vector store
Launchpad now has permission to send processed data directly into your ChatGPT vector store.
You can attach additional vector stores later if your AI architecture expands.
Step 4: Connect Launchpad to the Data Source
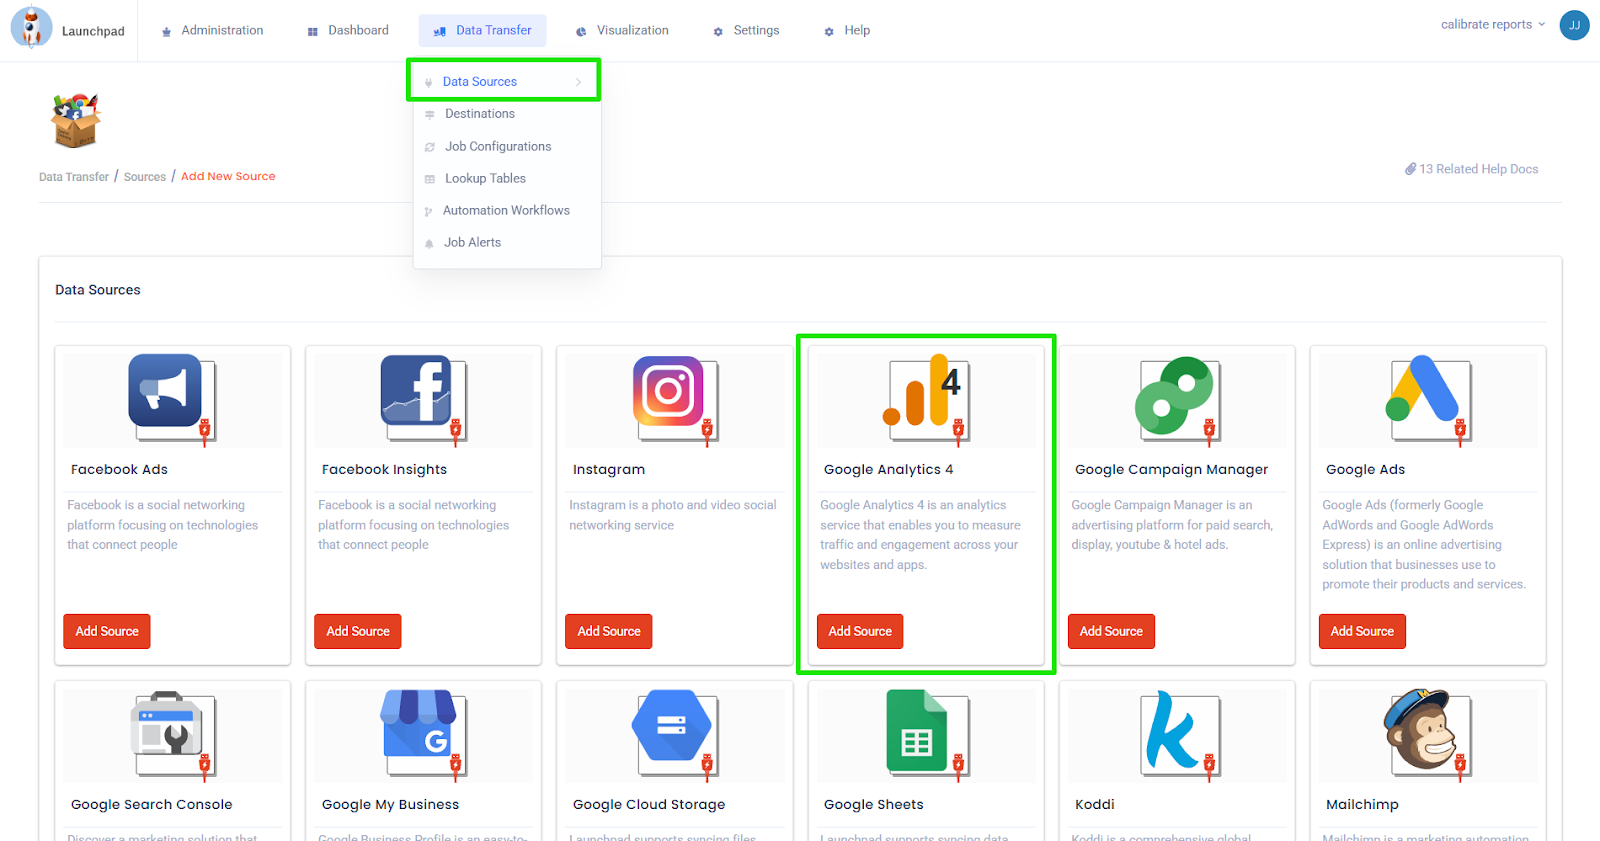
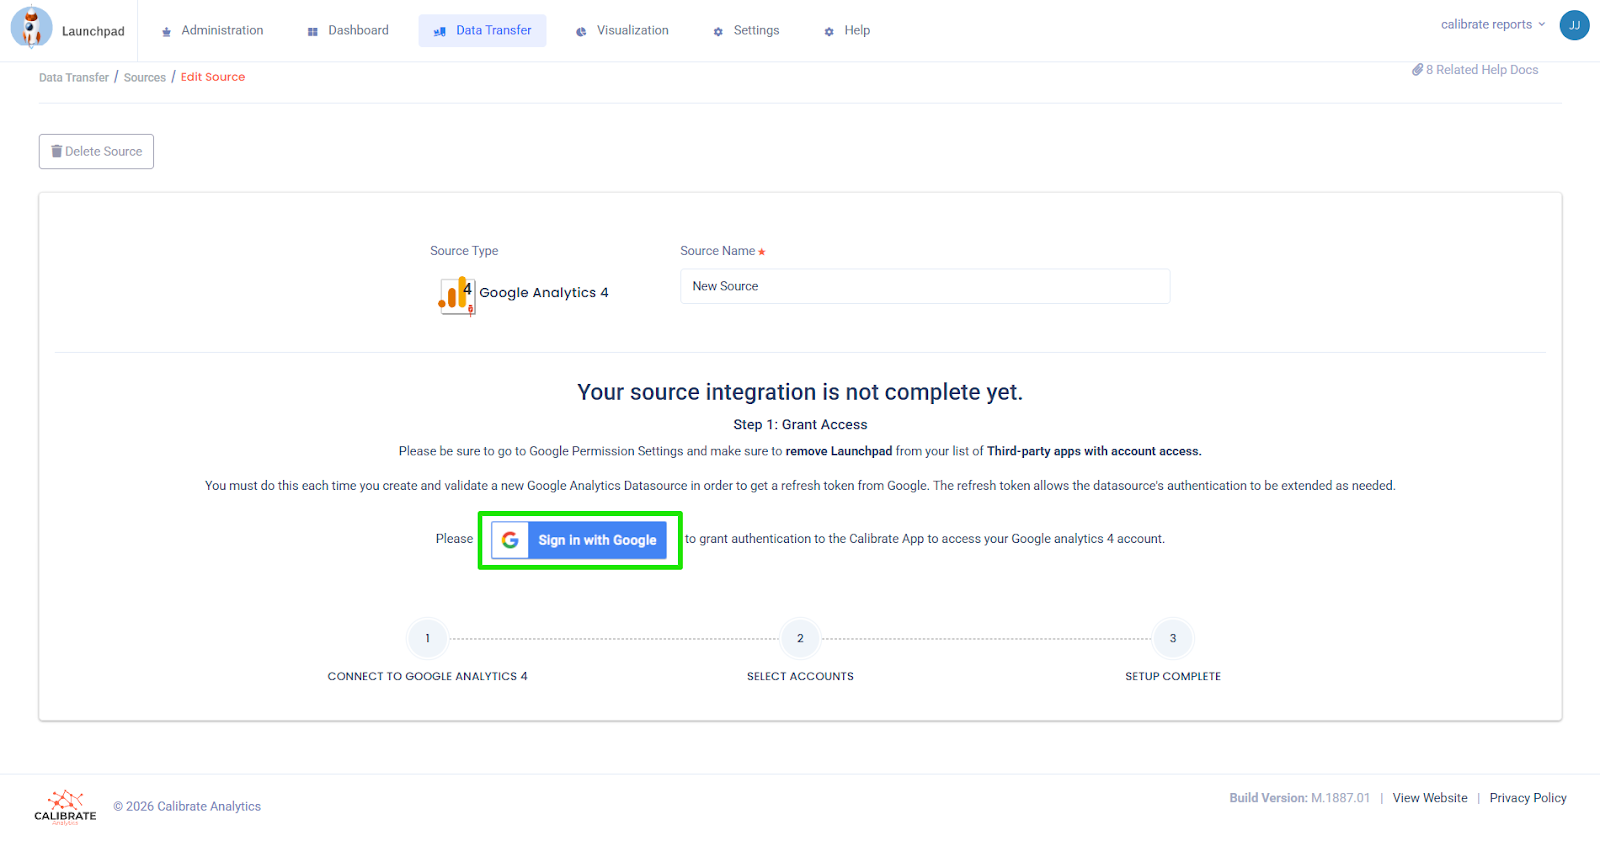
In Launchpad, navigate to Data Transfer → Data Sources
- Select "Add Source"
- Choose your platform, such as Google Analytics, a SQL database, a data warehouse, or a CSV upload
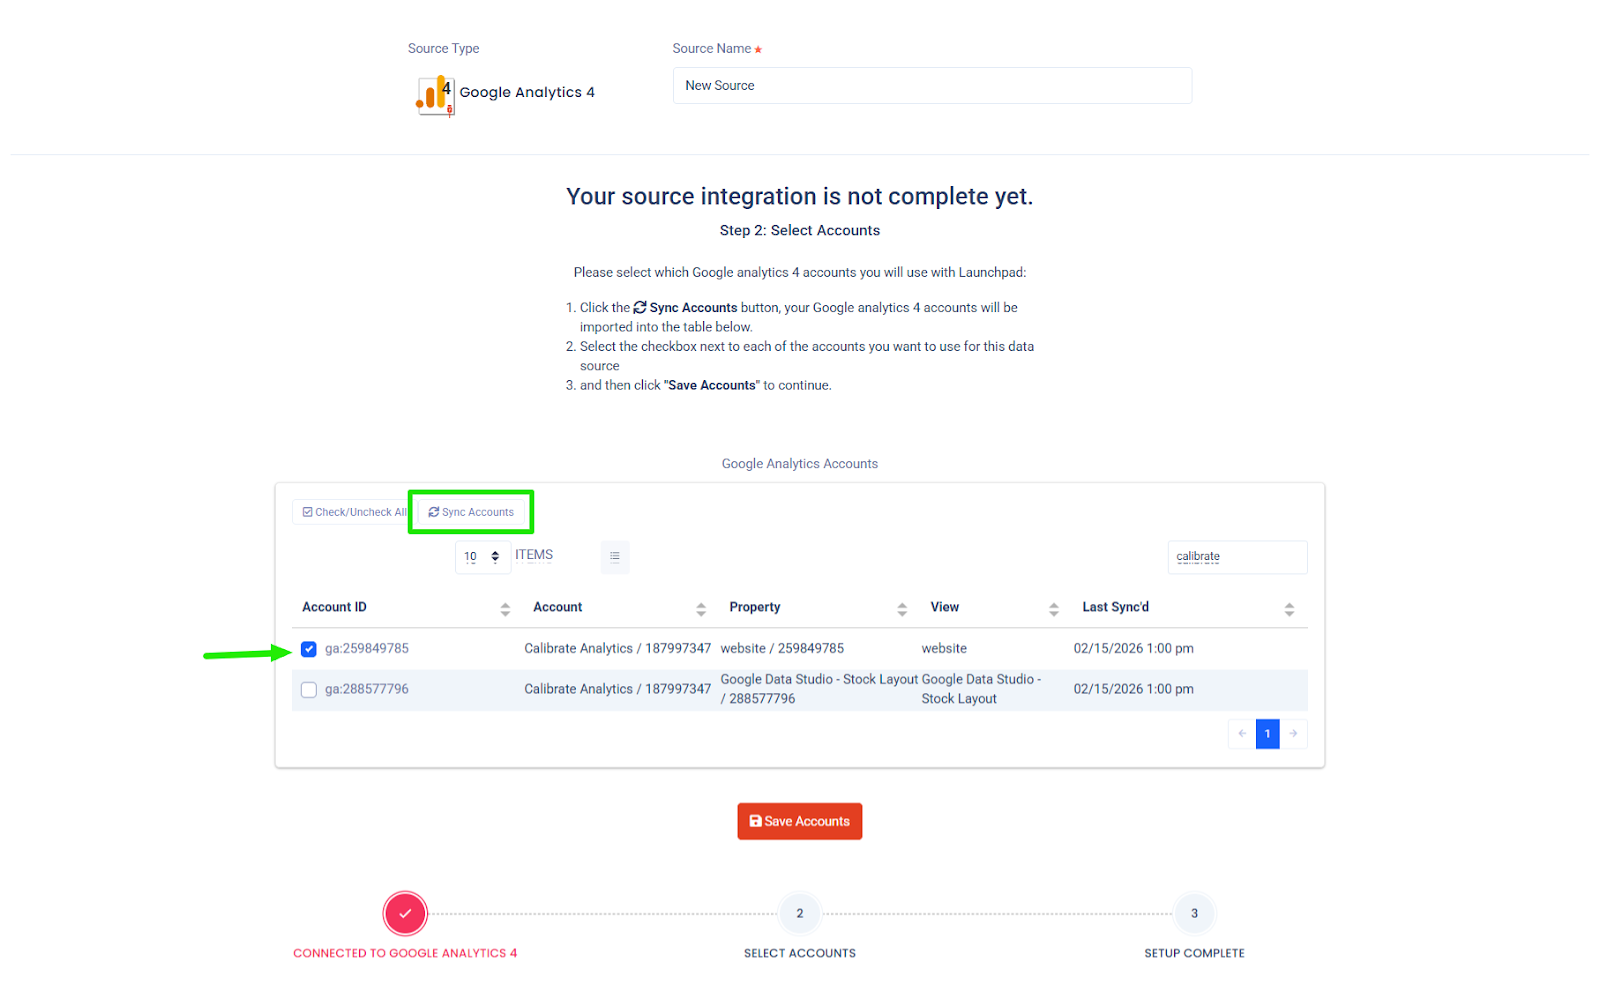
- Complete the authentication, select "Sync Accounts" to import source data, select the checkbox(es) by your desired accounts, then click "Save Accounts"
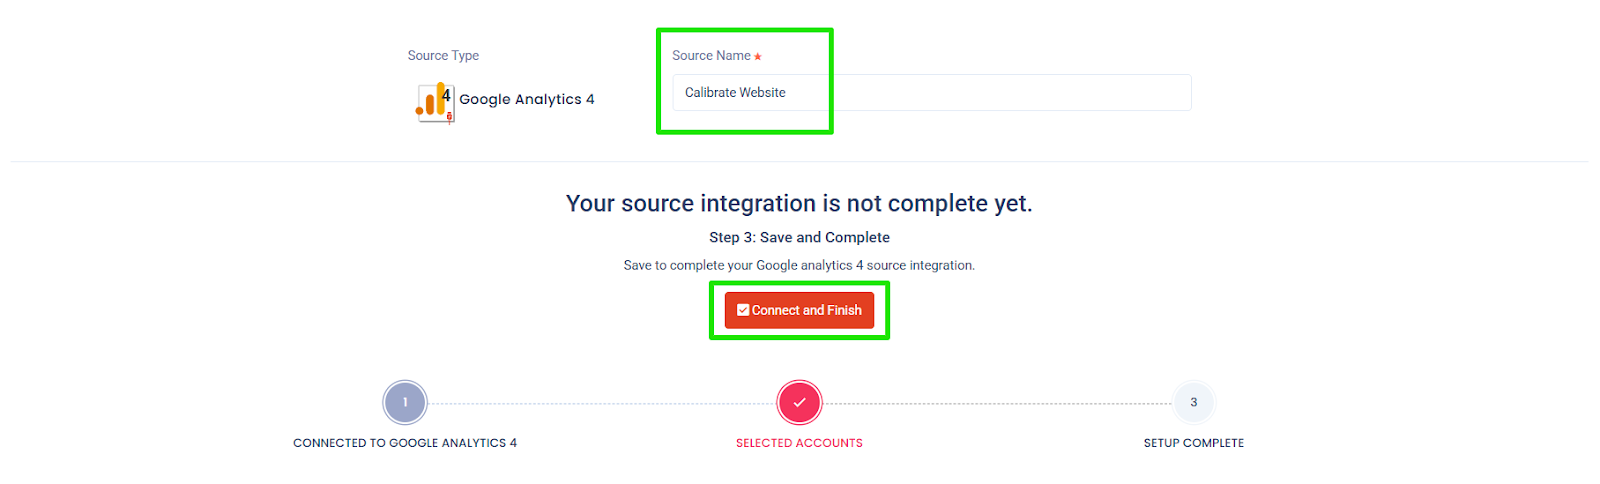
- Name your source, then select "Connect and Finish"
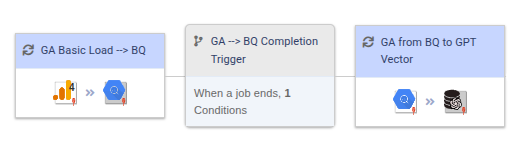
This step establishes the automated data pipeline that powers your AI analysis.
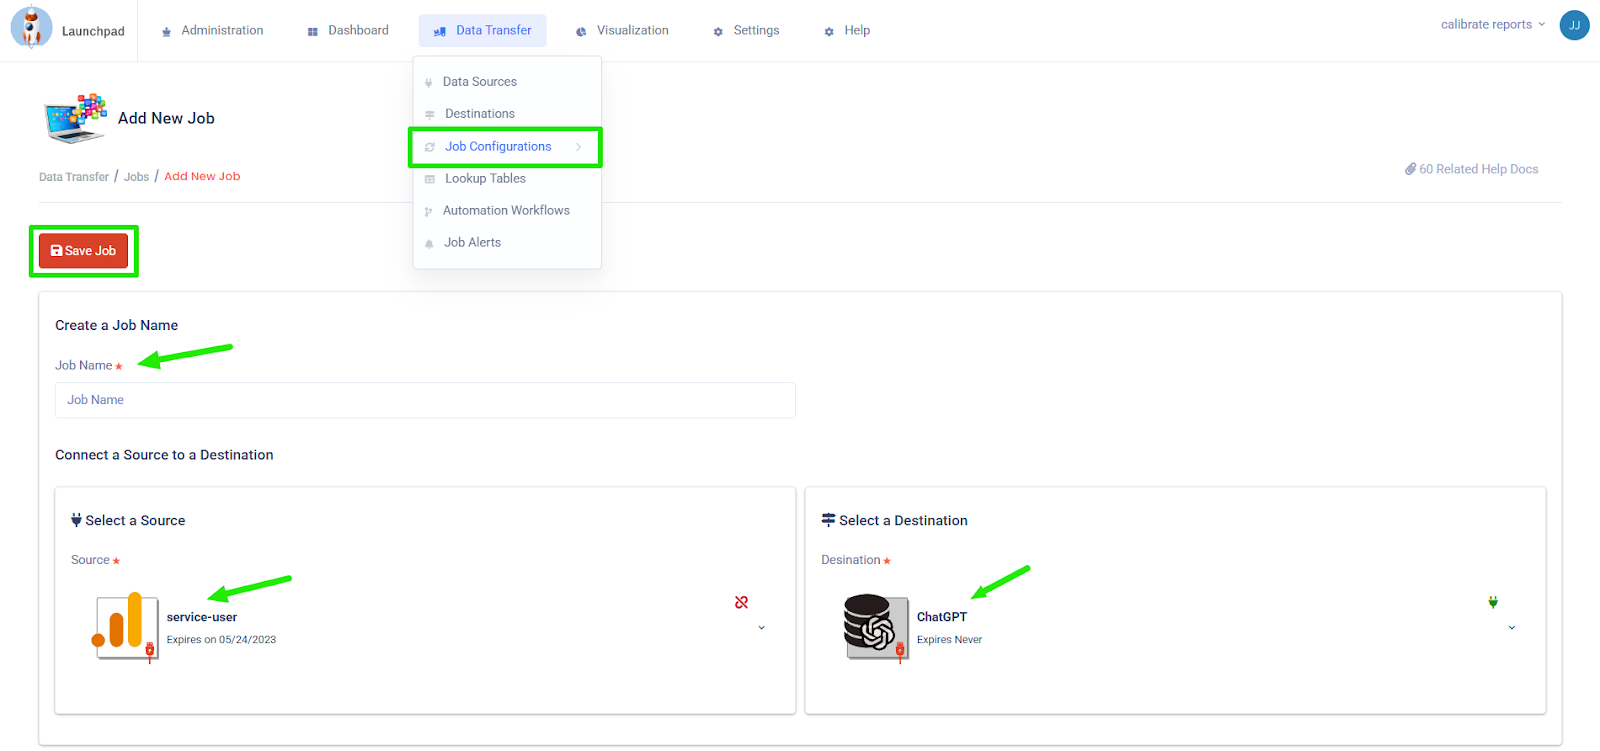
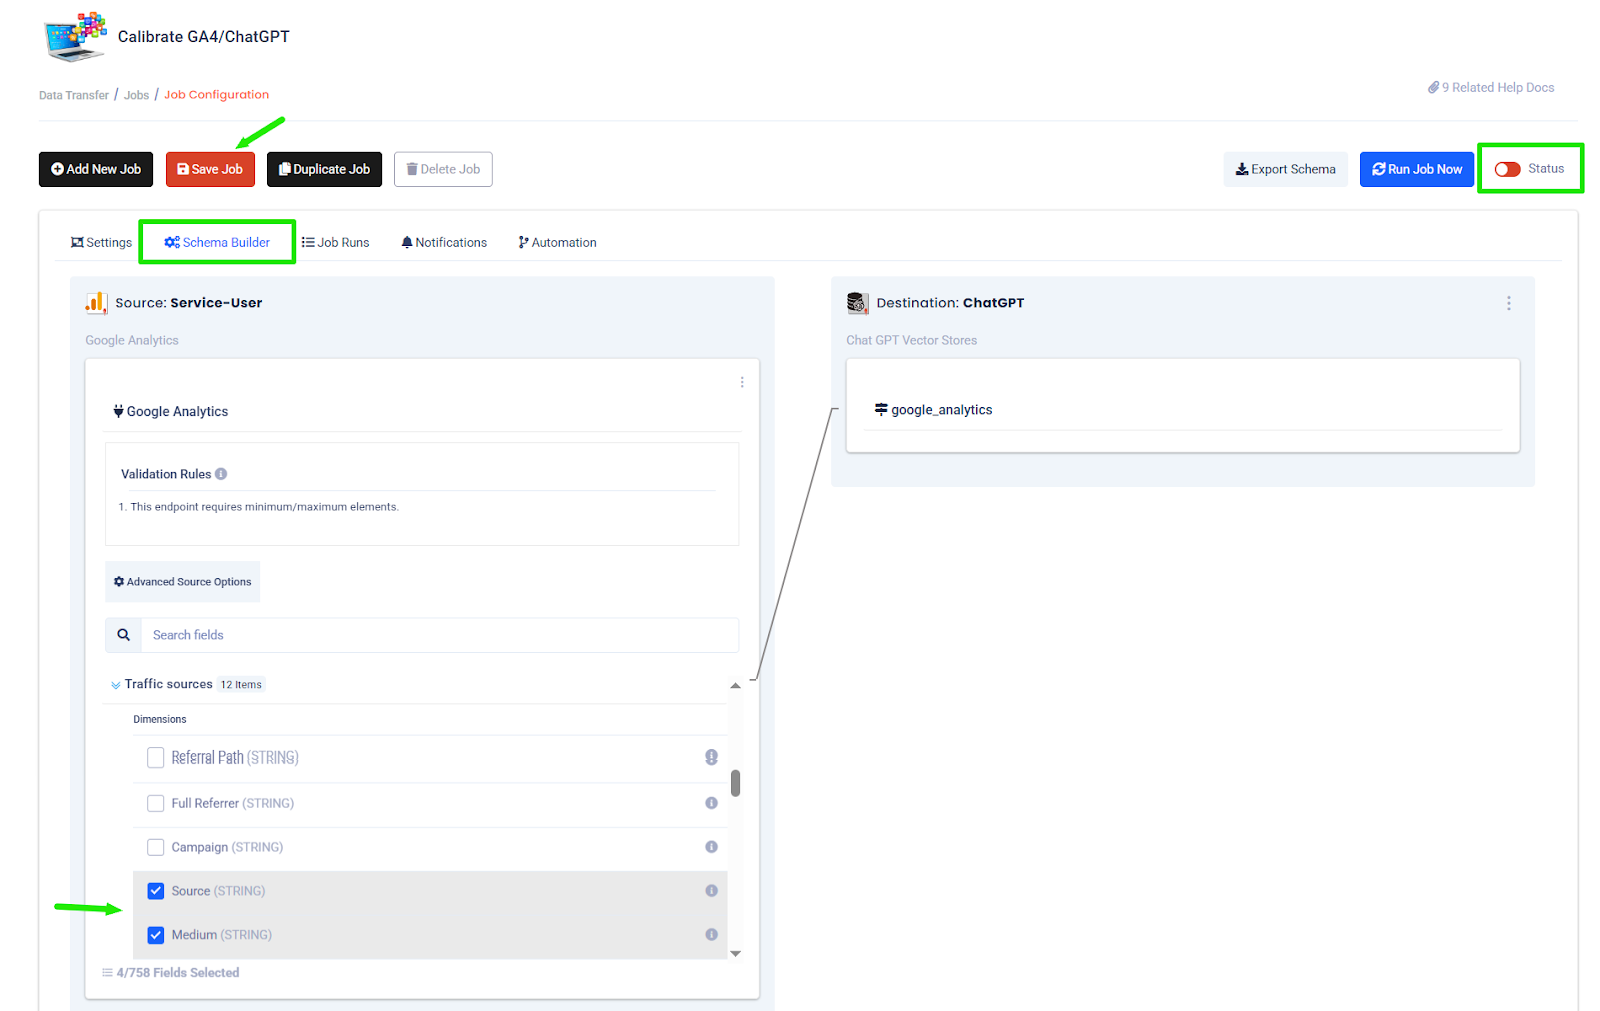
Step 5: Create a Job in Launchpad and Select Schema
In Launchpad, navigate to Data Transfer → Job Configurations
- Select "Add New Job"
- Under "Scheduling and Frequency," select a static or dynamic date range
- Create a Job Name, select your Data Source (from step 4), then select ChatGPT Vector Store as the destination
- Select "Save Job"
- Within the Job Configuration, navigate to the "Schema Builder" tab and select which metrics and dimensions will
be sent to the AI assistant
- This is a critical step. Schema selection determines which dimensions and metrics your assistant can analyze. A controlled schema improves accuracy and keeps the analysis focused on relevant KPIs.
- Toggle "Status" from red to green
- Select "Save Job"
Step 6: Select Dates for Analysis and Run the Job
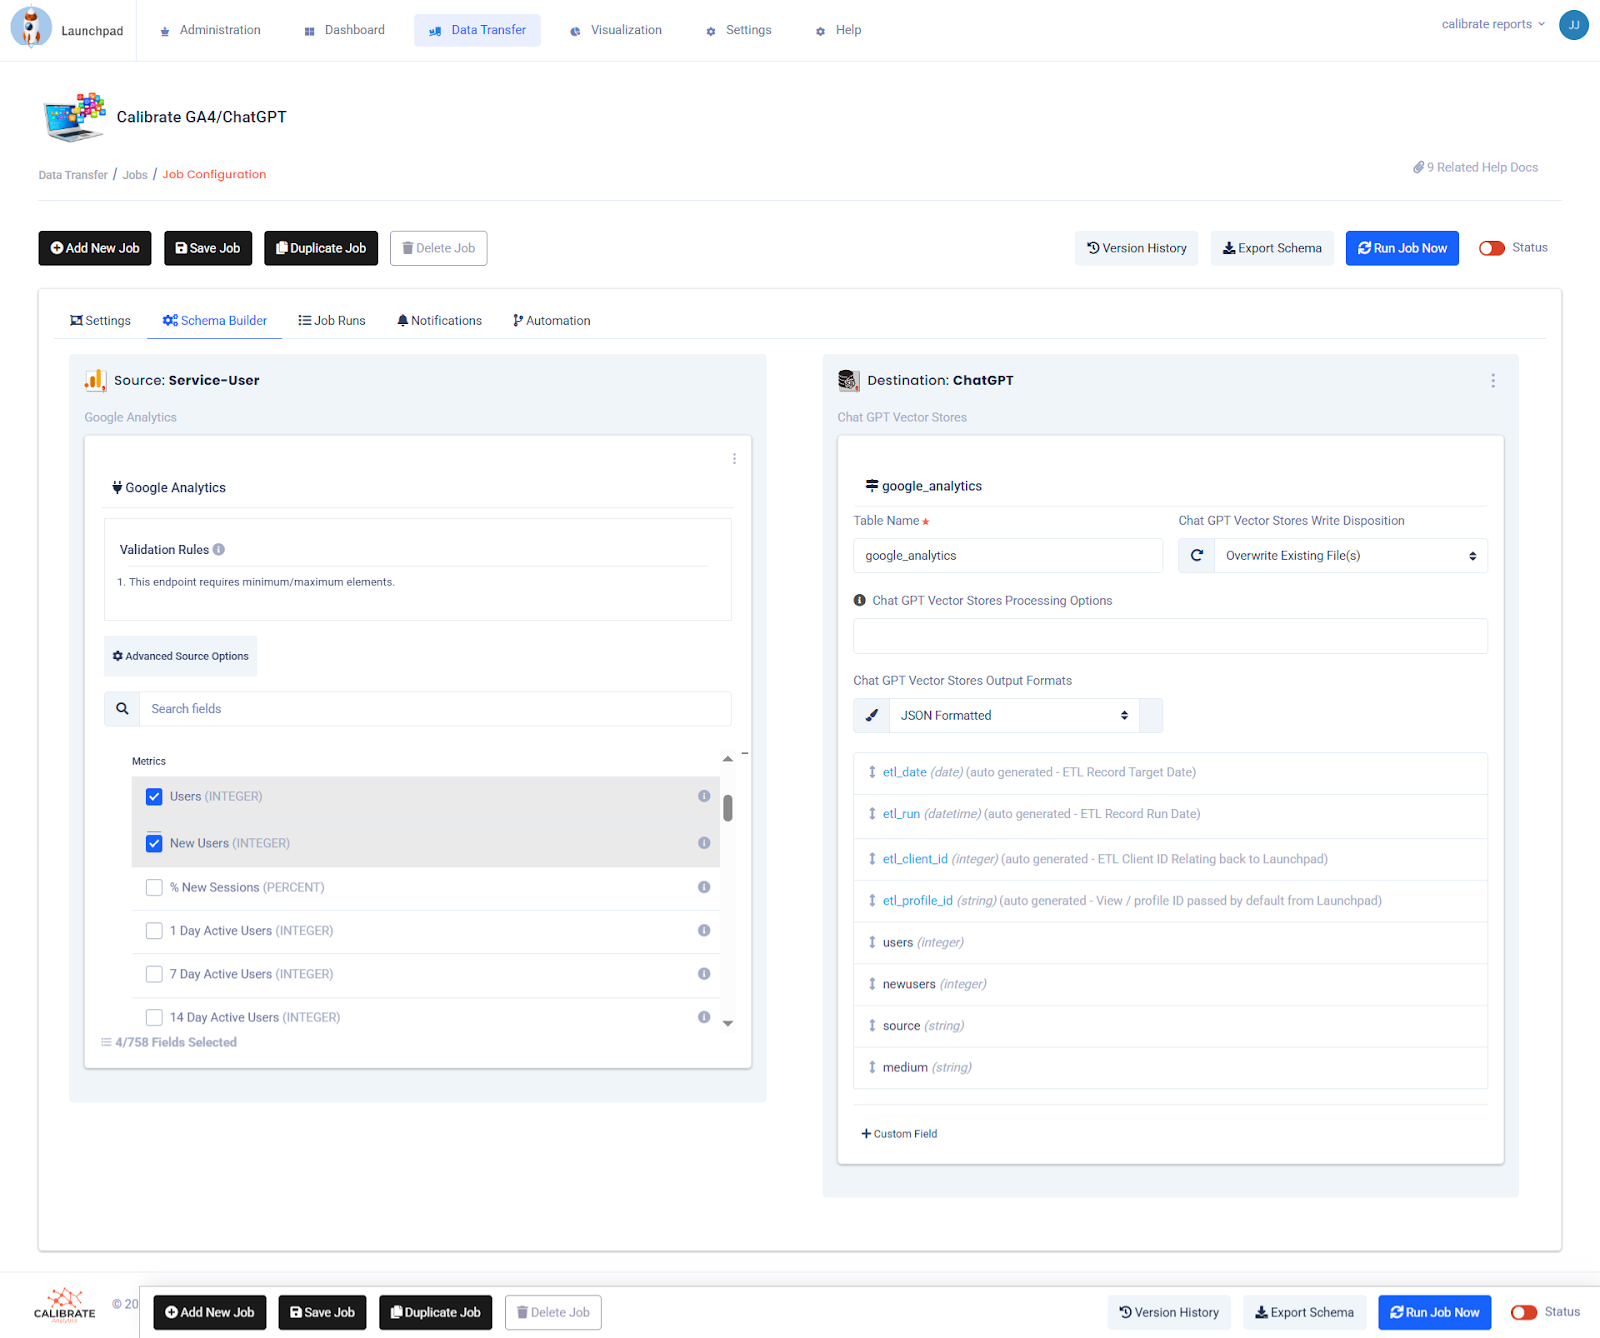
- In the job configuration, under the "Settings" tab, specify your date filters and pull frequency for the analysis
- Confirm the source connection and adjust checkboxes if necessary
- Confirm the ChatGPT target dataset
- Toggle "Status" from red to green
- Click the "Run job now" button
Once complete, Launchpad transfers structured, scheduled data directly into your ChatGPT vector store.
You now have a continuously updated AI-ready dataset.
Step 7: Confirm Data Loaded Correctly in ChatGPT Vector Store
Return to the OpenAI vector store:
- Search for sample records
- Validate timestamps and metadata
- Confirm fields are searchable
Quality assurance ensures your AI assistant is analyzing complete and accurate information.
Now you're ready to chat with your data directly in the AI assistant.
Step 8: Prompt the Assistant for Expert Analysis and Recommendations
Start a new conversation with your ChatGPT Assistant (now powered by your vector store data). Review the Assistant's analysis and cross-check with your expectations.
Example prompt:
    Analyze the latest [insert data domain, e.g., sales, user engagement, etc.]
    data from [date range]. Your objective is to identify key trends, anomalies,
    and areas for improvement, and, most importantly, to generate strategic
    recommendations that drive long-term business objectives.
Instead of generic insights, the assistant now works from your structured dataset. It can surface performance shifts, identify underperforming segments, and recommend optimizations aligned with your business goals.
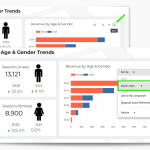
Example output:
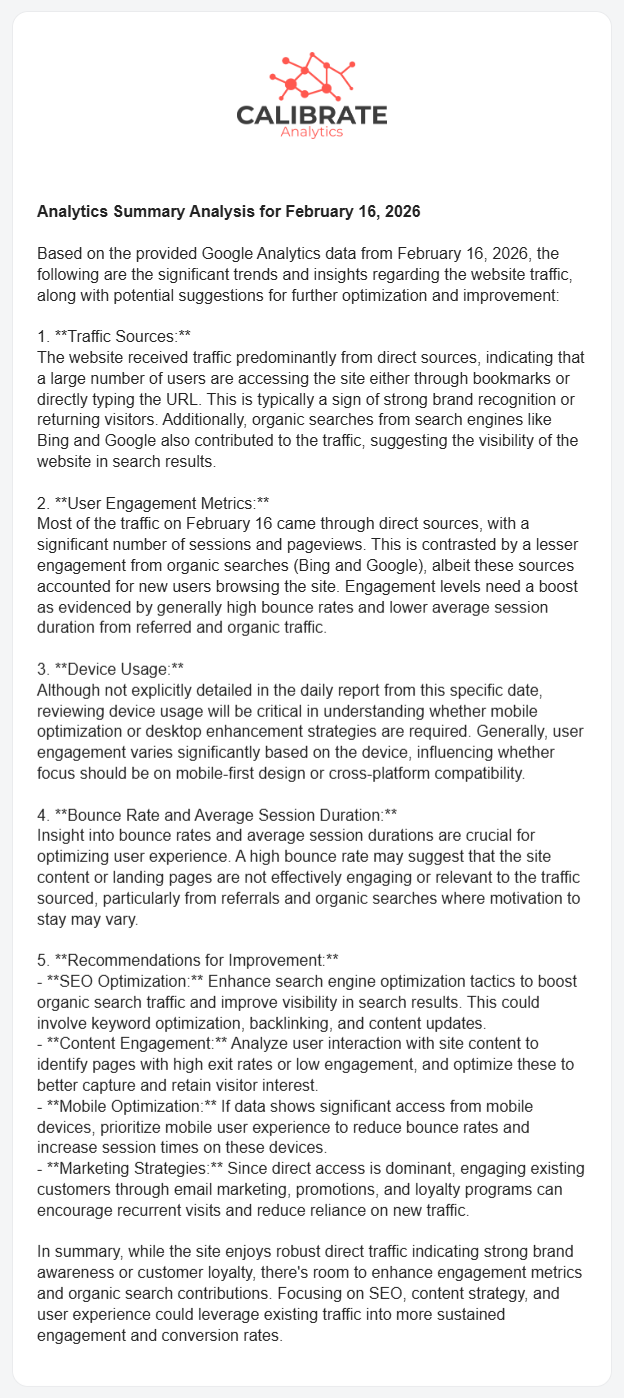
This type of email summary can be generated automatically and delivered to your inbox before you start your day.
What This Unlocks for Analytics Teams
When ChatGPT is connected to Launchpad and your data warehouse, AI becomes part of your analytics infrastructure.
You gain:
- Automated data pipelines
- Scheduled data transfers via API
- Controlled schema design
- Consistent AI-driven analysis
- Faster insight generation
This approach reduces manual exports, shortens reporting cycles, and creates a scalable AI workflow that fits within your existing data architecture.
If you're exploring how to integrate AI into your data warehouse, this workflow provides a practical starting point.
At Calibrate, we help teams build, automate, and scale their data infrastructure so AI becomes a competitive advantage, not just a test.
Ready to turn your analytics into an AI-powered decision engine? We'll help you build it the right way.